
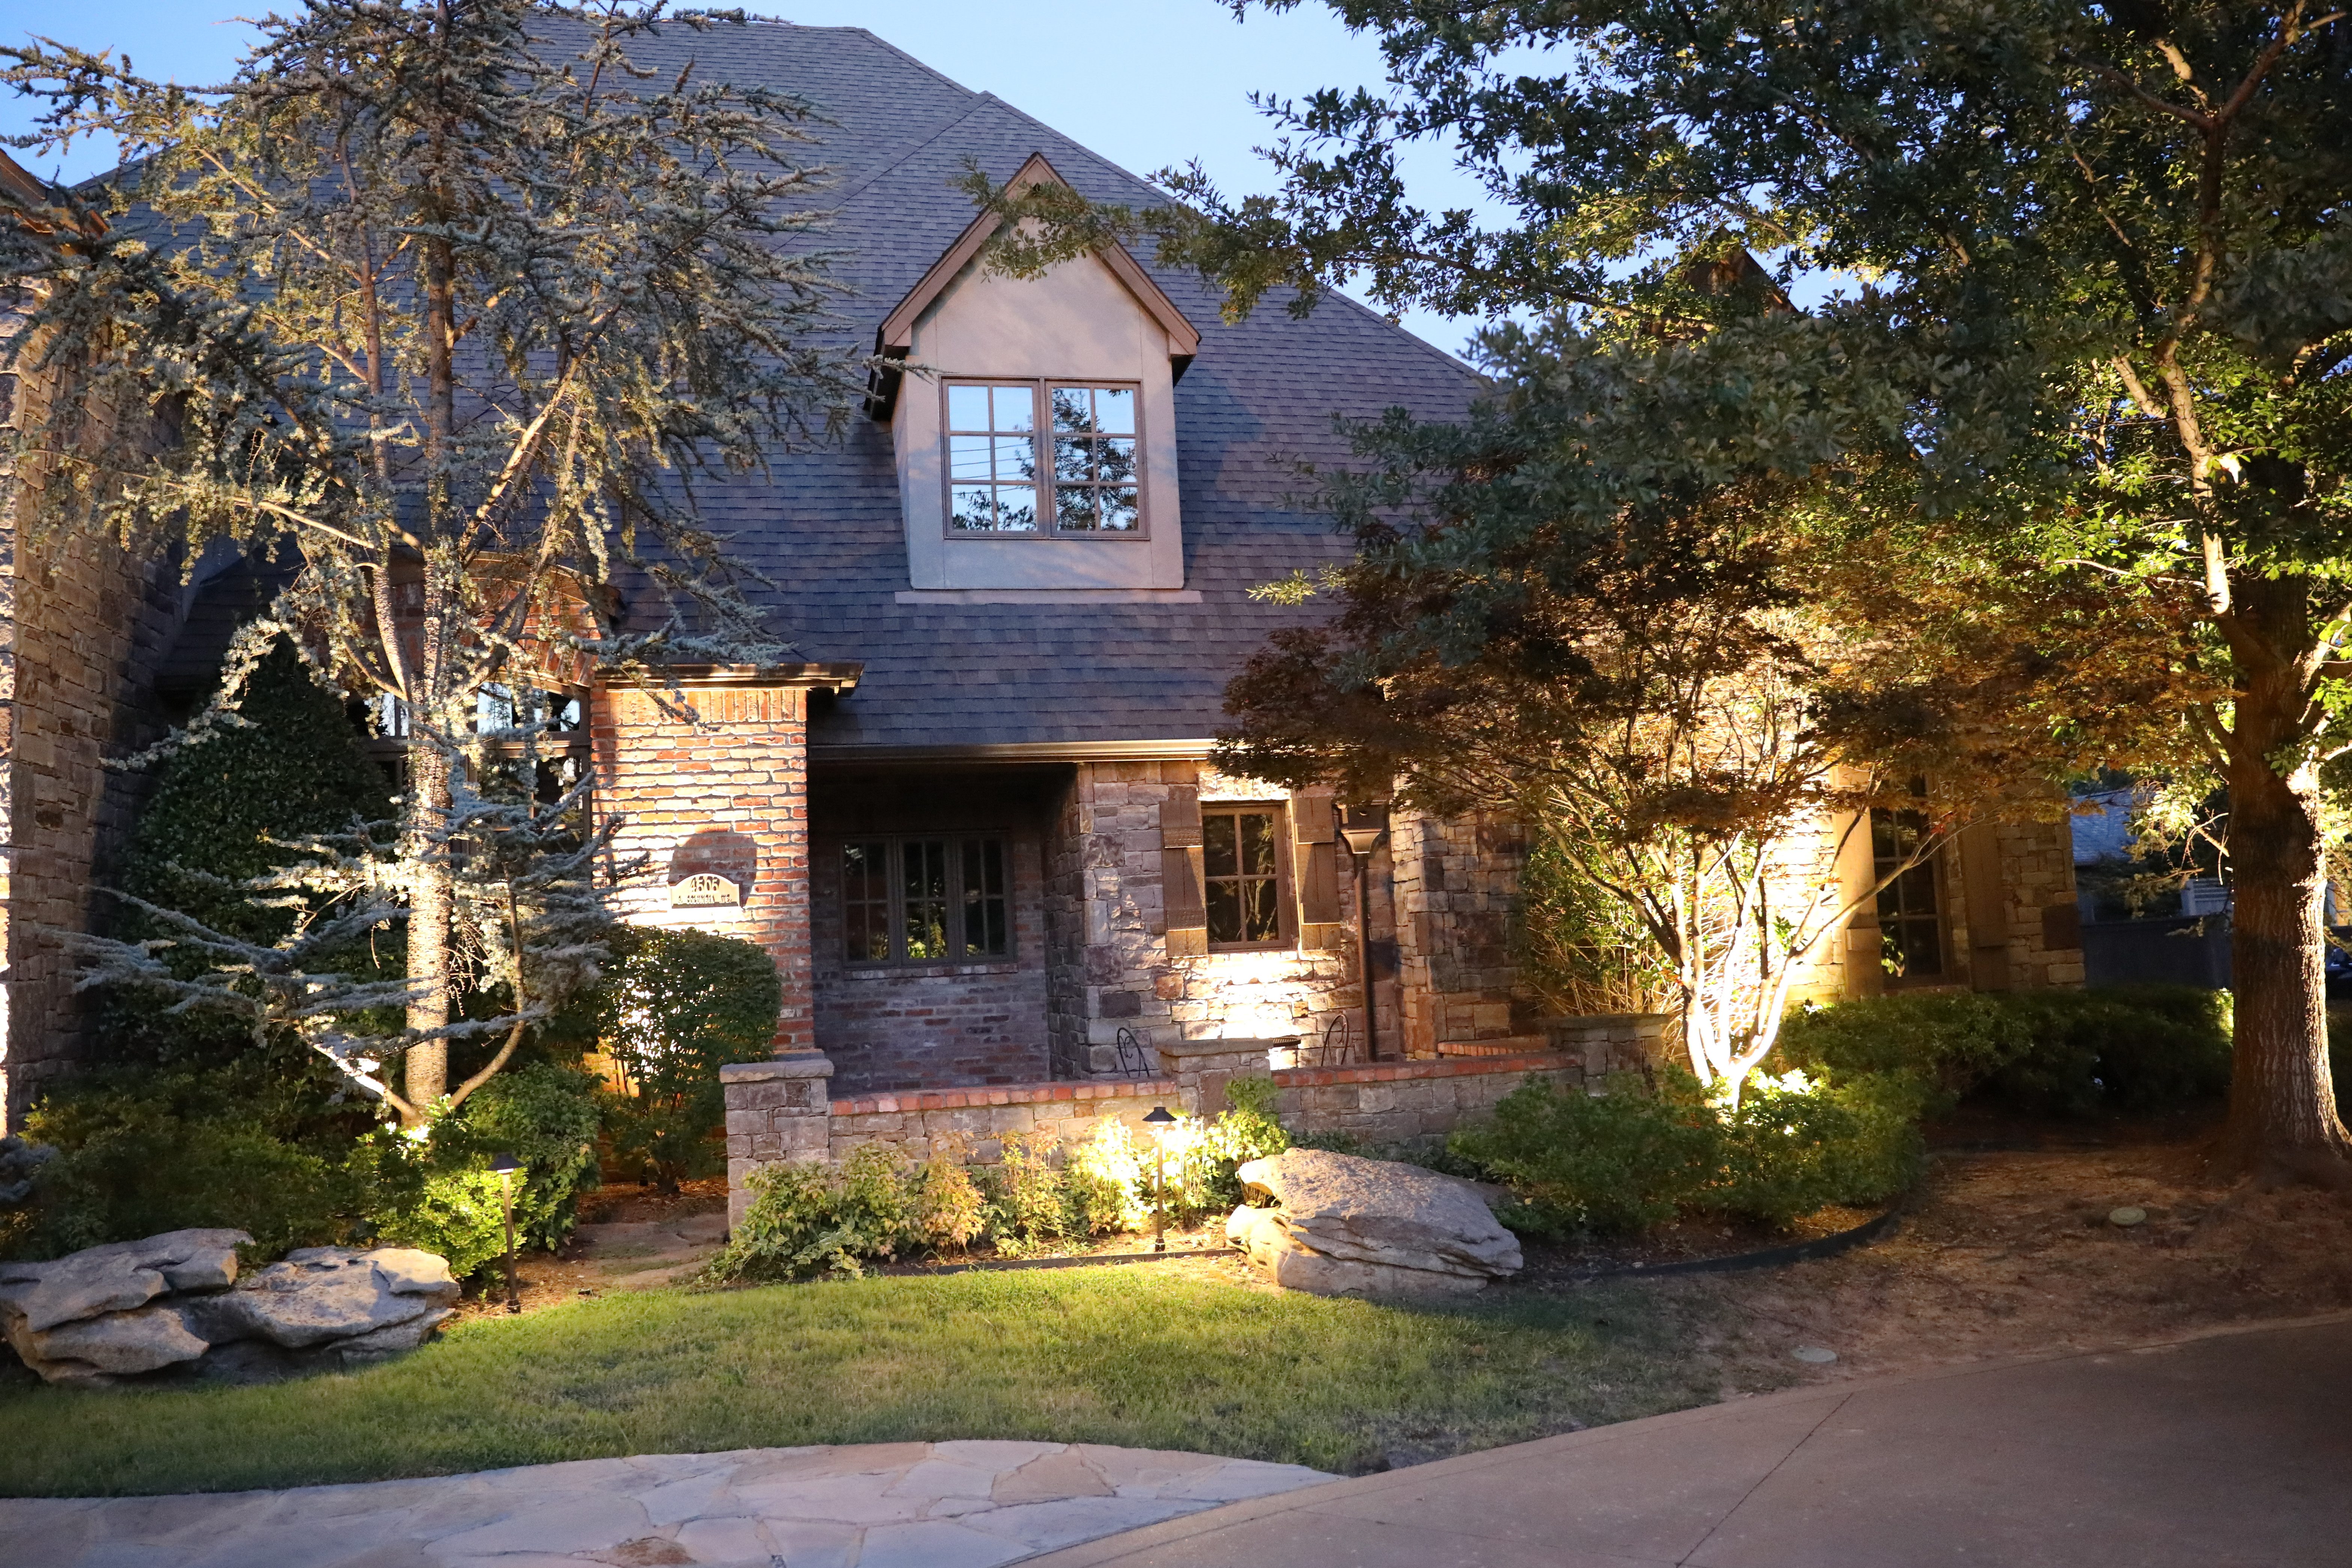
Trees can become some of the most dramatic features in a landscape after dark.
A mature oak, ornamental tree, or tall evergreen can completely change the nighttime look of a property when it’s lit correctly.
But tree lighting isn’t as simple as putting one fixture at the base and pointing it upward.
The best results come from considering the size, shape, canopy, trunk, viewing angle, beam spread, and overall role of the tree in the landscape design.
Done well, tree lighting can add depth, drama, atmosphere, and a strong focal point.
Done poorly, it can create harsh hot spots, glare, or an unnatural look.
The goal is simple:
Light the tree in a way that makes the tree look better—not the fixture more obvious.
Start With the Tree Itself
Before choosing a fixture, look at the shape of the tree.
Ask:
- Is it tall and narrow?
- Wide and spreading?
- Dense or open?
- Does it have interesting bark?
- Is the canopy the main feature?
- Is the trunk worth highlighting?
- Can the tree be seen from multiple directions?
A small ornamental tree shouldn’t be lit the same way as a 40-foot oak.
The lighting should match the scale and character of the tree.
Uplighting Is One of the Most Popular Tree-Lighting Techniques
Uplighting places fixtures near ground level and aims the light upward.
This can emphasize:
- Trunk texture
- Branching structure
- Height
- Canopy shape
- Overall form
It’s one of the easiest ways to turn a tree into a nighttime focal point.
For a smaller tree, one carefully placed fixture may be enough.
For a large mature tree, multiple fixtures may create a more balanced result.
Don’t Automatically Put the Fixture Against the Trunk
Placing a light directly at the base of the tree may illuminate the trunk but leave much of the canopy dark.
Sometimes moving the fixture farther away allows the beam to spread and reach more of the tree.
The right distance depends on:
- Tree height
- Canopy width
- Beam spread
- Desired effect
Moving a fixture even a few feet can dramatically change the appearance.
That’s why professional landscape lighting relies heavily on positioning and aiming—not just fixture selection.
Match the Beam Spread to the Tree
Beam spread is one of the most important factors in tree lighting.
A narrow beam works well for:
- Tall, slender trees
- Narrow trunks
- Vertical features
A wider beam may work better for:
- Broad canopies
- Large mature trees
- Wide branching structures
Using a beam that’s too narrow on a wide tree may only illuminate a small section.
Using a very wide beam on a narrow tree may spill light everywhere except where you want it.
The beam should fit the tree.
Large Trees Often Need More Than One Fixture
A large mature tree may look uneven if it’s lit from only one direction.
One side may glow while the rest disappears.
Using multiple fixtures from different angles can reveal more of the tree’s shape and structure.
For example, one fixture may highlight the trunk while another reaches into the canopy.
The goal isn’t to make every inch equally bright.
It’s to create depth and dimension.
Use Grazing to Highlight Interesting Bark
If a tree has beautiful bark, consider placing the fixture closer to the trunk.
Lighting across the surface at a shallow angle can emphasize:
- Texture
- Ridges
- Knots
- Natural irregularities
This creates highlights and shadows that make the bark more dramatic.
It’s the same basic idea used when grazing textured stone or brick.
Downlighting Can Create a Completely Different Effect
Tree lighting doesn’t always have to come from below.
Fixtures can be mounted higher in a mature tree and aimed downward.
This can illuminate:
- Lawns
- Walkways
- Driveways
- Patios
- Garden areas
Downlighting tends to feel softer and more natural than dramatic uplighting.
Moonlighting Uses the Tree as Part of the Design
One of the most beautiful tree-lighting techniques is moonlighting.
Fixtures are mounted high in the tree and aimed downward through the branches.
Leaves and limbs interrupt the light and cast natural patterns across the ground.
The result can resemble real moonlight filtering through the canopy.
Moonlighting works especially well over:
- Patios
- Driveways
- Lawns
- Walkways
- Seating areas
The best moonlighting feels subtle.
You notice the atmosphere before you notice the source.
Don’t Make Moonlighting Too Bright
Moonlighting loses its effect if it’s overly bright.
If the light feels like a floodlight mounted in a tree, the natural look disappears.
The goal is soft, gentle illumination.
You want enough light to create patterns and visibility without overpowering the landscape.
Consider the Viewing Angle
A tree may be visible from several places:
- The street
- Driveway
- Front entrance
- Patio
- Inside the house
- Backyard
Lighting should be designed around how the tree is actually seen.
A fixture that looks perfect from the driveway may create glare from the patio.
That’s why tree lighting should be evaluated from multiple viewing positions.
Avoid Glare
A bright fixture aimed toward someone’s eyes can ruin an otherwise beautiful design.
Fixtures should be positioned and shielded so viewers see the effect—not the bulb.
This matters especially near:
- Seating areas
- Walkways
- Driveways
- Windows
- Neighboring properties
Good lighting disappears into the landscape.
Don’t Over-Light the Tree
More light doesn’t necessarily make a tree look better.
Too much brightness can flatten the tree and erase the shadows that give it shape.
A better design uses contrast.
Some branches may be brighter.
Other areas may stay darker.
That variation creates depth.
Shadow is part of the design.
Warm White Usually Works Well on Trees
Warm white lighting often creates a softer, more natural appearance on residential landscaping.
It can complement:
- Bark
- Leaves
- Stone
- Brick
- Outdoor living areas
Cooler light may make foliage look brighter and more crisp, but warm light often feels more comfortable and inviting around a home.
The best color temperature depends on the property and surrounding materials.
Don’t Use the Same Lighting Technique on Every Tree
Different trees deserve different approaches.
A tall evergreen may benefit from narrow uplighting.
A spreading oak may need multiple fixtures and wider beams.
A small ornamental tree may look best with one subtle accent light.
A mature canopy may be perfect for moonlighting.
Using the same fixture, brightness, and angle on every tree can make the design feel repetitive.
Consider the Background
A tree looks most dramatic when it has contrast behind it.
A brightly lit tree against a darker background can stand out beautifully.
If everything behind it is equally bright, the tree may lose its impact.
This is another reason landscape lighting should be designed as a complete scene.
Small Trees Need Restraint
Smaller ornamental trees can easily be over-lit.
A large fixture or overly bright beam may overwhelm the tree.
For smaller trees, a softer light is often more effective.
The goal is to reveal:
- Shape
- Color
- Texture
- Branching
without making the tree look artificial.
Mature Trees Can Become Major Focal Points
Large trees are one of the biggest opportunities in landscape lighting.
During the day, they’re already part of the property’s character.
At night, they can become anchors in the design.
A beautifully lit mature tree can:
- Add height
- Create depth
- Frame the home
- Balance architectural lighting
- Add drama to a driveway or entrance
This is one reason tree lighting often plays such an important role in professional landscape design.
Don’t Forget How the Tree Will Grow
Trees change.
Branches grow.
Canopies spread.
Leaves become denser.
A fixture positioned perfectly today may need adjustment later.
Periodic maintenance can include:
- Re-aiming fixtures
- Moving fixtures outward
- Trimming vegetation
- Cleaning lenses
- Adjusting brightness
A good lighting system should evolve with the landscape.
Protect the Tree During Installation
Fixtures, wiring, and mounting methods should be installed carefully.
If downlighting or moonlighting fixtures are mounted in trees, the installation should account for tree growth.
The goal is to create beautiful lighting without unnecessarily damaging the tree.
Use Tree Lighting to Connect the Landscape to the Home
One of the biggest advantages of lighting trees is that it helps connect the architecture to the surrounding property.
Without tree lighting, the house may be illuminated while the yard disappears into darkness.
Add a few strategically lit trees, and suddenly the home feels connected to the landscape around it.
That creates a more complete nighttime scene.
Tree Lighting Works Best as Part of a Larger Design
A beautifully lit tree is impressive.
But it becomes even more effective when it works with:
- Architectural lighting
- Path lighting
- Hardscape lighting
- Patio lighting
- Other landscape features
The best landscape lighting feels intentional from one area to the next.
No single fixture or tree has to do all the work.
Professional Tree Lighting in Tulsa and Northeast Oklahoma
At Trinity 918 Designs, we design tree lighting around the individual tree and the property around it.
We consider:
- Tree size
- Canopy shape
- Bark texture
- Viewing angles
- Fixture placement
- Beam spread
- Brightness
- Color temperature
- Surrounding architecture
- Future growth
Then we choose the technique that makes the tree look its best after dark.
Our approach is simple:
Put the right light in the right place.
Ready to Make Your Trees Stand Out After Dark?
Whether you’re highlighting one beautiful tree or creating a complete landscape lighting design, Trinity 918 Designs can help you choose the right fixtures, angles, and lighting techniques for your property.
Learn more about professional landscape lighting from Trinity 918 Designs: